Sunday, December 2, 2012

Spicy 'Sketti Squash Patties with Cilantro Yogurt


I'm childishly in awe of spaghetti squash. It's almost magical how the squash so easily shreds into pasta-like strings. I can imagine an  infomercial with a very loud and aggressive host displaying the wonders of the squash and me, all wide-eyed and open-mouthed, gasping, "Wow! That really works! Looks just like spaghetti!  I'm really amazed"!

Like substituting mashed cauliflower for potatoes, spaghetti squash can be a great substitute for pasta, a perfect bed for just about any sauce. Like mushrooms, the squash happily accepts the flavor of whatever you choose to marry it with.

Still, I don't  make either of these substitutions very often because Mr. Rosemary remains a purist. (One of the reasons I love him, of course.)

When I have one of those "experimental whims" I'm  likely to test them out only  for myself. If they're a hit, I might share them. But usually, they're not.  Usually, I get a  "Not bad."

These squash patties met with that half-hearted blessing, too. Me? Loved them.  But I love curry. I love its lightly smoky sweetness. (I found a recipe for curry and cardamom cookies from The Spice House that I'm determined to make for Christmas.)

This is not, however,  an easy- to-do weeknight kind of dish. It takes time to cook the squash. Takes time to shred the said cooked squash. Time to mix the patties and time to cook them.  The good news is that they can be frozen without losing anything. Just a warm-up either on the stove top or in the oven, and they're ready again.

Spicy 'Sketti Squash with Cilantro Yogurt Sauce
4 cups cooked spaghetti squash
2 beaten eggs
1/4 cup chopped onion
1/2 cup all purpose flour
1 tablespoon curry powder

Combine all ingredients and mix till well-combined.
Heat a small amount of olive oil and a tablespoon of butter in a skillet over medium high heat. Drop squash mixture by heaping tablespoonfuls and cook for a few minutes on each side until golden brown. Serve with the cilantro yogurt sauce.

Cilantro Yogurt Sauce
1 1/2 cups plain Greek-style yogurt
3/4 cup finely chopped cilantro
4 tablespoons lemon juice
1 1/2 teaspoons finely chopped garlic
3/4 teaspoon cayenne pepper

Stir all the ingredients together, adding salt to taste. Chill to let flavors blend. Bring to room temperature before serving.

Tuesday, October 30, 2012

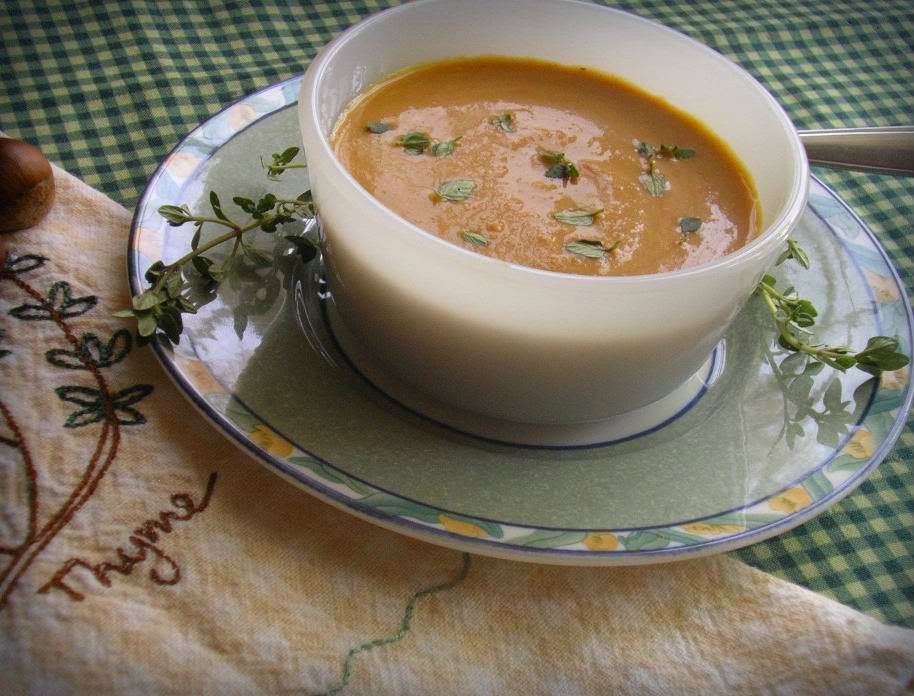
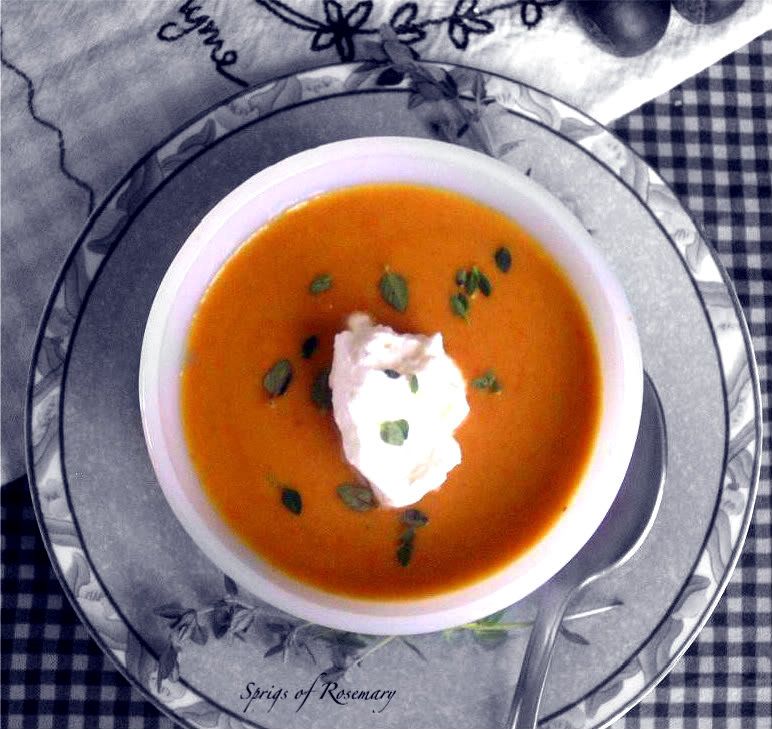
Nuts to Soup | Roasted Chestnut Soup with Thyme Cream


ChestnutSoup3 ChestnutSoup3-1.jpg


I never imagined that I'd be making soup from nuts -- I always thought of nuts as an additive, a very nice additive, but not the main part of anything, except for snacking. (And maybe my favorite pistachio ice cream.) But I've learned that chestnut soup is a very traditional fall soup, and a staple at many a Thanksgiving table.

It's a great soup.  It's rich, smooth and creamy, without cream. It gets its richness straight from the sweet chestnuts, which, I also learned is low in calories and has all kinds of other good things going for them, like they're the only nut that has Vitamin C. And they're gluten-free.

The only bad thing I can say about this recipe is that roasting and peeling the nuts is a bit of a chore. But it's worth the effort and certainly can be done ahead of time.

We're lucky to have a neighbor who gave us a couple chestnut tree saplings that finally bore fruit last year.  This was not a good year for our own trees but our neighbor still shared some of his.

[chestnuts%2520cu%255B5%255D.jpg]
The original recipe called for bottled chestnuts, which I've never even looked for in a store.  But at this time of year, chestnuts show up in many produce departments.

I  first posted this recipe about a year ago when I guest posted at Eat Yourself Skinny.  And I realized I never posted it here. So here you go . . . .

ChestnutSoup-1 ChestnutSoup-1.jpg

Roasted Chestnut Soup with Thyme Cream
adapted from Cooking Light
makes 10 servings

3 cups whole roasted (or bottled) chestnuts
2 cups chopped yellow onion
3/4 cup thinly sliced carrot
1 Tbsp olive oil
6 cups fat-free, lower-sodium chicken broth
5/8 tsp. kosher salt, divided
1/4 tsp. freshly ground black pepper
2 tablespoons sherry (optional)
1/3 cup heavy whipping cream
1 1/2 tsp. chopped fresh thyme leaves

Preheat oven to 400 degrees F.

Prepare the chestnuts.  Cut an X in the bottom of each chestnut. Place chestnuts on a jelly-roll pan and bake for 15 minutes.  Place chestnuts in large bowl and cool to room temperature. When cool enough to handle, peel the shells from the chestnuts.  (If you can find bottled or vacuum packed chestnuts, no need for this step!)

Prepare the puree.  Combine onion, carrot and oil on same jelly-roll pain.  Toss to coat the vegetables.  Bake for 1/2 hour or until tender, stirring occasionally.  Add the chestnuts in bowl and stir in broth.  Pour half the mixture into a blender and blend until smooth.  Pour the pureed mixture into a large pot.  Repeat procedure with remaining broth mixture.  Or, if you're lucky enough to have an immersion blender, put everything into the large pot and puree it all at once in the pot.  Stir in the 1/2 teaspoon salt and pepper.  Place pot over medium high heat and bring to a simmer, then reduce heat and simmer 20 minutes. Add the sherry, if you like.

Prepare the whipped cream.  Place cream in medium bowl and beat with a hand mixer at high speed until soft peaks form.  Add remaining 1/8 teaspoon salt and beat at high speed until stiff peaks form.

Serve.  Ladle soup into bowls and top serving with about a teaspoon of whipped cream.  Sprinkle with thyme and serve.

Wednesday, October 17, 2012

Sweet and Tart Cabbage Stew with Kielbasi


Cabbage gets a pretty bad rap, in my humble opinion.  It's often relegated to a back seat or it's dressed in a some kind of soupy disguise. Sometimes it's just filler. I admit it doesn't smell great when it's cooking, but its healthy attributes overshadow that one minor flaw.

But it's the star in a couple of my favorite comfort foods, stuffed cabbage and New England boiled dinner. And I love cole slaw, as long as it's not dripping in mayonnaise.  And Mr. Rosemary loves his pork and sauerkraut. 

Cabbage is a great veg in its own right.  It's high in Vitamin C, even higher than oranges! And loaded with roughage, and sulphur. It rivals kale for being a power food.

My sister gave me this recipe. She's a great recipe source; I know to trust her. She clipped this from the Pittsburgh Post-Gazette. (I still clip recipes from newspapers, too. Do you?) The article said it came from The Splendid Table, but she couldn't find it on the website. She knows that I always try to credit the source here.

Although I knew Mr. Rosemary would like this dish, he would only view it as a side. There has to be meat somewhere for it to be a real meal.  So I added kielbasi. I cooked the kielbasi separately, browning it then adding about  a 1/2 cup of apple juice and deglazed the pan.

There's a lot of spice in this recipe; don't be tempted to cut back.


Sweet and Tart Cabbage Stew with Kielbasi
Adapted from a March 2010 Pittsburgh Post-Gazette article and from “The Splendid Table Weeknight Kitchen Newsletter” 
Makes four generous servings
extra virgin olive oil
3 large carrots, peeled and thinly sliced
1 small (about 1 ¼ lb.) green cabbage, thinly sliced
2 medium to large onions, coarsely chopped
¼ teaspoon salt or to taste
½ teaspoon freshly ground pepper
5 large garlic cloves, minced
2 teaspoons ground allspice
1 generous teaspoon each ground coriander and ground ginger
2 tablespoons each sweet paprika and dried basil
2 tablespoons sugar (or more to taste)
1/3 cup vinegar (red wine or cider vinegar)
1 cup vegetable broth or water
14 ounce can whole tomatoes
Water, as needed
1 pound kielbasi, sliced and sauteeed in a separate pan

Film the bottom of a straight-sided 12” saute pan with oil and set it over medium-high heat.  Once it is hot, add the carrots, cabbage and onions.  Sprinkle them with the salt and pepper and sauté the vegetables for 10 minutes, stirring them often, or until they’re browning.  This is where the stew’s depth comes from. Stir in the garlic, the spices and sugar.  Cook until the spices are fragrant, but no more than a minute.

Pour the vinegar into the pan and boil it down as you scrape up any brown glaze from the bottom of the pan. When there is no liquid left, stir in the broth or water, and the tomatoes and their juice, crushing them with your hands as they go into the pan.  The vegetables should be barely covered with liquid.  Add a little water if necessary.

Bring the liquid to a gently simmer, cover the pan and cook for 10 minutes (check often for sticking) or until the carrots are barely tender.  Uncover the pan and turn up the heat so the liquid is at a fast bubble.  Cook off excess liquid, stirring the stew often to protect the vegetables from burning.  You want the sauce to be thick and rich tasting with a sweet-tart balance.  Add more sugar, vinegar, salt and/or pepper, as needed.
Add the cooked kielbasi.

Friday, October 12, 2012

Ketchup and Mustard for Fall | Tomato Bacon Jam and Shasha Sauce


A local radio station says, "Summer ain't over till we say it's over!"  Same goes for my garden.The leaves are turning, the days are shorter, the air is brisker, but the garden was still churning out a few tomatoes and peppers.

But all the tomatoes and peppers have been sauced, pureed, chopped, jarred, jellied, frozen or consumed. Just a few stragglers were left. These last few tomatoes and peppers needed to get dressed for fall. So instead of summer's ketchup and mustard they became tomato bacon jam and shasha sauce.

Don't get me wrong: There's absolutely nothing wrong with ketchup and mustard.  There's nothing more All American than squirting good gobs of the yellow and red stuff on a hot dog grilled on an open fire.

But come fall, it's time to warm things up.  Both these sauces are great condiments and very versatile  They can dress up a hot dog or hamburger -- or a steak. They can be spread on a sandwich or toast or be part of a crudite platter.


Side by side, they're a great pair of hot and sweet.  The mustardy shasha sauce is very hot, especially when I used the last of the serrano peppers as part of the mix along with jalapeno and bell peppers. And the tomato bacon jam is smoky and spicy.  Just like fall.

I first learned of the shasha sauce reading Pass the Sauce.  This saucy blogger was inspired by Michael Symon's recipe. So mine is a combination. Both recipes used Hungarian banana peppers, one canned, one fresh. I just used the variety of "leftover" peppers from the garden, including my serranos and some banana peppers.

The tomato bacon jam came from sister. Sorta. It's actually a misnomer because the recipe she gave me included apples and was meant to be served with feta on crostini. (Although she confessed to me that she subbed bleu cheese.) But crostini-with-tomato-and-bacon-and-onion-and-apple-jam-with-feta is a mouthful, a pretty tasty mouthful. Anyhow, what doesn't bacon make better?  (Maybe bleu cheese.)

The recipe my sister gave me also included apples and used canned tomatoes, but since I had the tomatoes (and no apples) this is what I came up with.

Before the recipes, let me share with you a couple pictures of the garden's guardians this summer.


My neighbor shared my garden this year with me and fashioned these great scarecrows. They must have done the trick because, although we had a very dry summer, we still had a pretty good bounty.


They're stored away in the barn now, in hibernation before they have to go on duty again next spring.

Now that I've made you look at my scarecrows, here are the recipes . . . .

ShaSha Sauce
inspired by Pass the Sauce, inspired by Michael Symon
12 fresh Hungarian peppers or a jar of banana peppers (or, like I did, their rough equivalent in volume!)
4 cloves garlic
1 cup yellow ballpark mustard
1 cup white wine vinegar
1/2 cup + 2 tablespoons granulated sugar
2 tablespoons all purpose flour (optional)
Process peppers with the garlic, mustard and vinegar until pureed.  Add puree to a hot saucepan and add in sugar. Simmer 30 minutes.  Add a slurry of flour and water to thicken if desired. Simmer for another 20 minutes or so. When cool, pour into glass jars and store in the refrigerator up to a month.

Tomato Bacon Jam
inspired by my sister and from Better Homes and Gardens, September 2010
½ pound smoked bacon
about dozen (1 1/2 pounds) tomatoes, mixed variety, chopped
1 cup sugar
1 small yellow onion, diced
3 Tbsp. cider vinegar
1 ½ tsp salt
¼ tsp. ground pepper

In a large skillet over medium heat, cook the bacon until it is just browned, about 5 minutes. Transfer the bacon to paper towels to drain excess fat.  Crumble or cut into small pieces. 

In a large saucepan, cook the chopped tomatoes on medium heat until they're softened and their liquid cooks down, stirring frequently, about 15 minutes.  Add the, sugar, onion, vinegar, salt, pepper and bacon.  Bring to a boil over medium heat and cook, stirring often for 12 minutes or until most of the liquid is reduced. Store in fridge up to a week.

Monday, September 24, 2012

A Spoonful of Secret Sugar | Pistachio Ice Cream


I've been keeping a secret: All summer long I've been making ice cream, almost once a week. (And, believe me, I have the extra poundage to prove it.)

For Mother's Day, my daughter Amy gave me the ice cream maker attachment for my Kitchen Aid mixer and I've had a ball experimenting. I think of all the desserts in the whole wide world, ice cream -- well, well-made ice cream -- has to be the best treat. Really. Forget my other favorites: cheesecake, apple crisp, German chocolate cake, pecan pie. All very good, of course, but nothing beats really good ice cream.

To assure myself of success right out of the chute, the first ice cream I made was straight out of the manufacturer's book. It was caramel nut ice cream. And it was very good.  How could it not be? It had sweetened condensed milk, cream, dry pudding mix and a jar of caramel topping in it! (Now you understand the weight gain!)

Then I tried a plain vanilla ice cream a couple times, using pretty much the same recipe. But I was getting a mite bolder and decided to add my own touch -- a bit of cinnamon and some chocolate chips to one batch. That didn't suit Mr. Rosemary. After one bite he said, "What's that funny taste?"  Not "Hmmm. That's good. What's in there?" No, something funny. 

But the grandkids ate it. (And it was good.)

And then I made cookie dough ice cream from The Cookie Dough Lover's Cookbook.  An indubitable success. Outstanding.  Everyone liked it. Me. Mr. Rosemary. And the grandkids.

But the ice cream flavor I really wanted to make was pistachio.  My all-time favorite ever since I was a little kid and had my first one at the Howard Johnson's, or HoJo's. 

After I hunted a few recipes, I put the one I finally made on the the refrigerator door. I kept it there for a couple months to daily tease me until I finally made it.  I was intimidated by the thought of curdling the eggs. Or maybe by not cooking the custard long enough. Or too long.

The more likely truth about why I procrastinated was that I didn't want to shell all the nuts. Plus, it was hard to keep a bag of nuts around.  Mr. Rosemary and I both love to snack on them.

But I finally kept a stash hidden, shelled them and made a batch. And it was everything I wanted. Except the &*%$^# stuff is really difficult to photograph! So you'll just have to believe me. It was really good, really worth it.

And  -- dare I say? -- even better than HoJo's. 


Pistachio Nut Ice Cream
from Brown Eyed Baker
Makes about 1½ quarts

1 1/3 cups shelled pistachio nuts
¾ cup sugar
2 cups heavy cream
1 cup whole milk
Pinch of salt
6 large egg yolks
1 teaspoon vanilla extract
½ teaspoon almond extract
¾ cup pistachios, coarsely chopped

Grind the 1 1/3 cups of pistachios in a food processor until finely ground, but not to a paste. Set aside.

In a medium saucepan, warm the milk, sugar, 1 cup of the cream, and salt, stirring to dissolve the sugar. Stir in the ground nuts. Cover, remove from the heat, and let steep for at least 30 minutes.

Strain the warm nut mixture, pressing on the nuts to extract as much liquid as possible, and discard the solids. Return the milk and cream mixture to the saucepan. Pour the remaining 1 cup cream into a large bowl and set a mesh strainer on top. In a separate medium bowl, whisk together the egg yolks. Slowly pour the warm mixture into the egg yolks, whisking constantly, then scrape the warmed egg yolks back into the saucepan.

Stir the mixture constantly over medium heat with a heatproof spatula, scraping the bottom as you stir, until the mixture thickens and coats the spatula. Pour the custard through the strainer and stir it into the cream. Add the vanilla extract and almond extract and stir until combined.

Refrigerate until cold. Pour into an ice cream maker and freeze according to the manufacturer’s directions. Once finished churning, fold in the ¾ cup pistachios with a rubber spatula.


Tuesday, September 11, 2012

Headed to Maine | Blueberry Cheesecake Pie


We'll be leaving for a Maine vacation shortly and I'm very excited about it. I've never been there and it's a trip that's been on my bucket list. (So is Italy -- Tuscany, Naples, Amalfi, Palermo, I don't care. Soon.)

And is it just coincidental that in recent weeks a couple blogs I frequent wrote about their trips to Maine? Joy the Baker enjoyed a schooner trip (and lobster) and Karen at The Back Road Journal posted about Bar Harbor and Acadia National Park and Rockport.  And after I commented on Karen's blog, I heard from Linda, another Maine blogger, who gave me some great insider information.  If my appetite wasn't whetted before then, it sure is now.

And although the scenery is the biggest attraction, food comes in at a very close second.  And I don't think there's anyplace that has two foods more synonymous with its name than lobster and blueberries, is there?

I don't have lobster very often so I'm anxious to wrestle a couple. Blueberries I get plenty of, since we have 10 bushes of our own. I know Maine blueberries are different: they're wild, low bush berries, mine are the cultivated, high bush. Supposedly Maine berries are sweeter, but I'll reserve judgment, since I like my own pretty darn well.

In the meantime, if I wasn't ready already, this pie helped put me more in the Maine frame of mind. I made  pie filling with my frozen berries and it was just great. I make a pretty darn good traditional cheesecake, if I do say so myself,  but this pie is less cheesecake, more blueberry and it's a very nice change of pace from my usual blueberry sauce topped cheesecake.  Would it be any different with Maine blueberries?

Blueberry Cheesecake Pie
makes about 10 servings
adapted from Eagle Brand

1 recipe blueberry pie filling (see below)
1 unbaked pie shell -- your own pastry or purchased
1 8 ounce brick of cream cheese, softened
1 14 ounce can sweetened condensed milk
2 large eggs
2 tablespoons lemon juice
1 teaspoon vanilla extract

Preheat oven to 425 degrees F.  Combine 1 cup of the blueberry pie filling (reserve the rest for topping) and pour into the pie crust.  Bake 15 minutes.

In a stand mixer, beat the cream cheese until fluffy.  With motor running, gradually pour in the sweetened condensed milk, eggs, lemon juice and vanilla.  Pour into partially baked pie.

Reduce oven temperature to 350 degrees F. and bake an additional 25 minutes or until set.  Cool. Chill. Spoon the remaining blueberry filling over sliced pieces as you serve them.

Blueberry Pie Filling
adapted from food.com
2 pints (4 cups) blueberries, fresh or frozen)
3/4 cup sugar
3 tablespoons cornstarch
3 tablespoons water
1 teaspoon lemon rind
1/2 teaspoon cinnamon
1/4 teaspoon nutmeg
2 tablespoons unsalted butter

Combine 1 cup berries with 3/4 cup sugar in pan on stove. Simmer on low heat until sugar is melted and mixture is very liquid, about 5 minutes.  Combine cornstarch and water in a bowl and then add to the pan with the blueberries.  Cook over medium heat until mixture comes to a full boil and is clear and thick. Pour hot mixture into a large bowl and let cool until warm.  Fold in the remaining 3 cups of blueberries, lemon rind  seasoning s and butter. Let cool before adding to pie crust or using in the cheesecake pie recipe above.

Saturday, September 8, 2012

The Loneliest Cookie | Chocolate Peanut Butter Cheesecake Bar


Who leaves just one cookie on the plate? What difference is that little bitty piece of sweetness going to make to your waistline when you've already had more than your share? Who leaves just one cookie!?!

Mr. Rosemary does.

An incurable late night snacker with a sweet tooth, he is. He's mindful of what he eats all the rest of the day, but late at night, catching up on whatever golf, tennis, football or hockey event he'd DVR'd, he'll go on the prowl for something sweet. Sometimes it's something salty he goes after. Sometimes it's sweet before the salt.

Sweet or salty, listen to my story:

I had made these chocolate peanut butter cheesecake bars for my brother-in-law's birthday party. My SIL was making a cake, but to make sure there were plenty of sweets all around, I volunteered to bring something extra: these cookies.

I didn't leave myself enough time to photograph any before we left the house, so I sneakily held a few back, and put them in the fridge.

The next day, when I went to get the cookies out for their photograph, I found one lonely cookie, left in the container and put back in the fridge, snugly lidded and all.

He wasn't in the house when I found them. Had he been, he swould have heard me scream -- just a little.

Yikes, how can I take a picture and post it? One little bitty cookie. And I have nothing else ready to post!  And it's been over a week since I put up anything new!

Guess I'll just have to tell the truth.

And the truth is he was saving the last piece for me.


Chocolate Peanut Butter Cheesecake Bars
Makes 24 Bars
For the Crust:
2½ cups chocolate graham cracker crumbs
2 tablespoons granulated sugar
½ cup unsalted butter, melted
For the Peanut Butter Cheesecake:
16 ounces cream cheese
1 cup granulated sugar
½ cup creamy peanut butter
3 tablespoons all-purpose flour
4 eggs
½ cup whole milk
1 teaspoon vanilla extract
For the Chocolate Glaze:
6 ounces milk or semisweet chocolate, finely chopped
1½ teaspoons vegetable shortening 

1. Make the Crust: Preheat oven to 350 degrees F. Whisk together the graham cracker crumbs and sugar. Add the melted butter and toss together with a fork until the crumbs are all evenly moistened. Press the crumbs into the bottom of an ungreased 9×13-inch baking pan. Bake for 8 to 10 minutes; remove to a wire rack and cool.
2. Make the Cheesecake Layer: Beat together the cream cheese, sugar, peanut butter and flour on medium speed until smooth and creamy. Add the eggs, one at a time, mixing well and scraping the sides of the bowl after each addition. Slowly pour in the milk and then the vanilla extract and beat until combined.
Pour the cheesecake batter over the crust and bake for 35 to 45 minutes, or until the cheesecake layer is set around the edges and still appears slightly soft Chocolate & Peanut Butter Cheesecake Bars
when the pan is wiggled. Allow the cheesecake to cool completely in the pan set on a wire rack.
3. Make the Chocolate Glaze: Combine the chopped chocolate and vegetable shortening in a small bowl and microwave on 50% power in 30-second increments, stirring after each, until completely melted. Spread the melted chocolate evenly over the cheesecake layer. Refrigerate for at least 1 hour, then cut into squares and serve. Store leftovers in an airtight container in the refrigerator.