Friday, January 31, 2014

Cosmic Snow Rollers | Quick Chicken Chili


When we looked out into the yard last Monday morning, we were astounded by the sight of  "snow rollers," although at the time we didn't know what they were. The entire yard, all our fields, were dotted with balls of snow of all sizes. We theorized as we walked to and from the barn to feed the horses (in the sub-zero temperatures) that "That sure must have been some wind last night" and "Look how this one just rolled down the hill!"

As we learned during the day, this was indeed a rare phenomenon, one that occurs only when all the perfect meteorological conditions exist at the same time. As I drove into town later that morning, it was absolutely breathtaking to see that the entire area had been sprinkled with these ethereal looking snow masses.

Some people likened them to rolls of toilet paper, or bales of hay. I thought they looked like cannoli, ready to be filled with sweetened ricotta and speckled with chocolate.  I read that this has only happened once before in Pennsylvania, and that was 10 years ago. (I must have been sleeping.)

It has been one weird and terribly frigid January -- the coldest in a century, I read -- and I for one will be anxious to hear the groundhog's report this weekend. Spring can't be soon enough.

The good thing about this kind of weather is that it demands comfort food and I had a craving for chicken chili. I've made a version of this several times, but I wanted to hurry things along. So I found a quick version in a back issue of Cooking Light. (I'm in the midst of whittling my "I'm sure I'll use them some day" pile of cooking magazines down. It's a slow but very enjoyable task. This could take a while.)

With a few changes made possible by my pantry contributions, I had this chili ready in less than 20 minutes.
And then I carried my bowl into the living room and sat by the fire. Winter can be good.


Quick Chicken Chili
adapted from Cooking Light

1 tablespoon grape seed oil
1 pound skinless, boneless chicken breast, cut into bite-size pieces
1/2 cup chopped onion
3 cloves garlic, minced
2 teaspoons ground cumin
1 teaspoon dried oregano
1/4 teaspoon ground red pepper
2 15-ounce cans cannellini beans, rinsed and drained
1 15-ounce can creamed corn
1 cup water
2 4-ounce cans chopped green chilies, undrained
1 whole fresh jalapeno, chopped (ribs, seeds, and all!)
1 14-ounce can chicken broth


  • Heat a soup pot over medium high heat. Add oil. 
  • Add chicken and saute about 4 minutes.
  • Add onion, garlic, cumin, oregano and red pepper; saute 3 minutes.
  • Add 1 can of the beans, the can of creamed corn, the water, 1 can of the chilies, the fresh jalapeno and the broth.
  • Bring to a boil.
  • Mash the second can of beans with the second can of chilies in a bowl with a fork. (Or puree in a food processor.) Add to the soup and simmer 5 minutes.

Makes about 6 servings

Wednesday, January 22, 2014

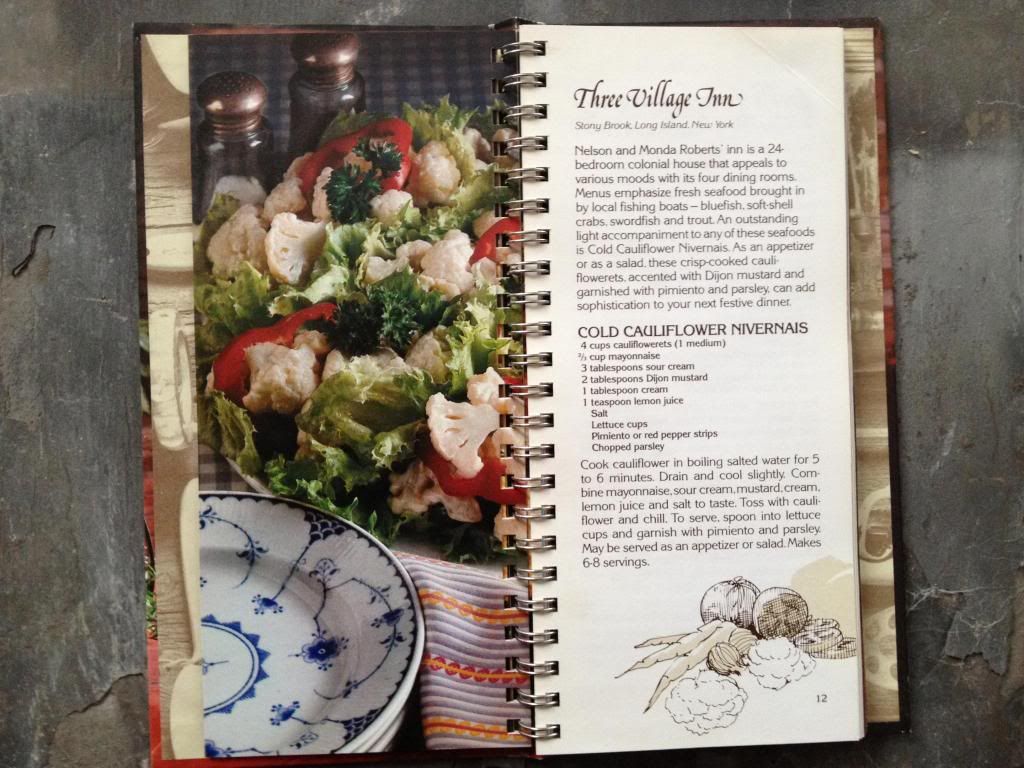
Cold Cauliflower Nivernais Salad (and Benson & Hedges)


Although promotional cookbooks still exist, none can compare in quality and class to those produced by the masters: Benson & Hedges. Their marketing people were geniuses. They managed to commandeer the cooking prowess of the likes of James Beard to partner with them in creating honestly great cookbooks!


For those non-smokers (or youngsters!), Benson & Hedges is a brand of cigarette originally produced in Great Britain. When Philip Morris bought the brand in the 1960's and extended the length of the cigarette to 100 millimeters and put their marketing machine to work, a bold marketing campaign was unleashed and we benefited from these cookbooks!

The cookbook I got this cauliflower recipe from, "Recipes from Great American Country Inns," was part of a pile of cookbooks my sister gave me. Another cookbook collector, my sister was dividing her spoils with me after a friend of hers (another addict, to be sure) cleaned house.


I picked this recipe because the page was dog-eared. I figured someone else must have liked it. While it was good, it wasn't a bell-ringer, just a nice mild accompaniment to a spicy dish.I would like to try the Peanut Soup from the Wayside Inn, in Middletown, Virginia. Or maybe the Braised Lamb Shanks, from The Golden Lamb in Lebanon, Ohio.

So how does my version compare with the pro's?


By the way, "Nivernais," for the French-challenged like myself (despite four years of study) is a former province of France. I'm not sure what makes it "Nivernais" or even French. Is it the mustard? The cream? I know I have difficulty trying to name something I've created. A geographic appellation is often used but I can't imagine naming anything I've created "a la Fisher," my little village!

Cold Cauliflower Salad Nivernais
from Three Village Inn, Long Island, New York
via Benson & Hedges "Recipes from Great American Country Inns"
Makes 6 servings
4 cups cauliflowerets (1 medium head)
2/3 cup mayonnaise
3 tablespoons sour cream
2 tablespoons Dijon-style mustard
1 tablespoon cream
1 teaspoon lemon juice
1/2 teaspoon salt
Lettuce -- your choice
Pimiento or red pepper strip and chopped parsley for garnish

Cook the cauliflower in boiling salted water for 5 to 6 minutes. Drain and cool slightly.
Combine the mayonnaise, sour cream, mustard, cream , lemon juice and salt. Toss with cauliflower and chill.
To serve, toss with torn lettuce leaves and garnish with the pepper and parsley.

Monday, December 23, 2013

Merry Christmas Cranberry Salad

I have never been much of a cranberry fan. Or a Jello fan either. I must harbor strange childhood memories:

  • A family holiday tradition was making a cranberry relish that had only three ingredients -- freshly ground whole cranberries and whole oranges, sweetened by as much sugar as you wanted (or not.) The grinding was fun, but I really didn't like the texture of the relish. My adult senses are wiser.
  • I distrusted any food that you could see through. Or that jiggled. I didn't think it was fun food;  it just reminds me of bad school cafeteria fare. Although cafeteria food has much improved, I do believe Jello is still a staple. I would eat it only to strengthen my nails.
This salad was different. It has been the regular contribution of a family to our annual church Christmas dinner. Last year I was so bold as to ask the man (who I didn't know too well) for the recipe. He immediately began rattling off the precise measurements.

"Wait a minute, wait a minute, Dave," I said. "Let me get a pen!" I was really surprised that the recipe had Jello in it; although I wondered as I was writing things down, if plain gelatin and fruit juice would be a good way to make this. But first, try it as written. I did . . . and I still liked it.


After I thanked him and started walking away, Dave, the retired accountant, said, "You know, it's not a cheap salad to make." and then he began itemizing the cost of each ingredient. Even the math-challenged me recognized that it wasn't a bargain. But it is Christmas, after all, and generosity prevails.

When I asked what his family called it, he just shrugged and said, "We always just called it Christmas salad."

So that's what we'll call it here.


Christmas Cranberry Salad
3 cups whole cranberries
1 1/2 cup sugar
1 large package raspberry Jello (any red flavor will do)
1 cup grapes, seeded and halved
1 cup chopped walnuts
1 cup crushed pineapple, undrained

Cook the cranberries over medium heat  until they have popped. Add the sugar and Jello and stir until dissolved. Remove from stove-top and cool until the mixture starts to thicken; then add the grapes, walnuts and pineapple. Chill  until ready to serve.


Merry Christmas to you and yours . .  and best wishes for a happy new year!

Saturday, November 16, 2013

Pickled Brussels Sprouts and Pantry Envy


If I was upset that the blight spoiled  the garden's tomato crop this year, the Brussels sprouts more than compensated for it by nearly over-achieving. We had a small forest of mini-palm trees growing well into October, though they might have lasted through a couple frosts, if we hadn't been so eager to get "winter-ready."

I've grown to love Brussels sprouts, even though as a kid the mushy, smelly little cabbage heads had no appeal for me. (Little sister Rita, however, has always loved them; I happily gave her my share.)

I thought it was just the fact that my taste had matured that changed my outlook on Brussels sprouts. But I learned that there's a scientific reason that Brussels sprouts have become more fashionable: Breeding research conducted in the Netherlands about 30 years ago resulted in less bitterness and improved health benefits. This led to increased cultivation and a surge in the vegetable's popularity.

If you'd like to read more about Brussels sprouts, try a nice article about Brussels sprouts that called them "The Unexpected Culinary Swan."

Discovering different ways of preparing Brussels sprouts has to account for its increased popularity, too. It used to be that boiling or steaming them was the only way we knew to prepare them. Now, since they are less bitter, sauteing and roasting, even raw in salads, have become increasingly popular, and infinitely tastier, ways of cooking Brussels sprouts. My favorite way to cook sprouts is roasting, although this recipe is darn good.)

Although I love the sprouts fresh, I'm not too fond of them frozen. I did freeze a few quarts  this year, but despite the fact I blanched them briefly, put them in an ice water bath, and drained them well before vacuum sealing them they're just not as good as fresh.

Since I had this bumper crop then, I had to come up with another way to preserve some of this bounty. The answer: Pickling!

My neighbor Dude (Yes, it's the real name of my 70 something neighbor; has been since he was 8 years old!) cans quite a lot. Fresh vegetables, pickled vegetables, soups, stews, just lots of stuff.  I knew he did because we swap garden stories all spring and summer.

But it wasn't until he took me to visit his pantry that I realized just how much he did can. Just take a look at this . . . .


And this . . . .


I always get a sweet sense of satisfaction when I go to my basement and see my little jars of garden treasures, glistening like jewels under the light. But my little store pales by comparison to Dude's mother lode! See why I have a twinge of pantry envy?

Do I dare take a jar of my pickled Brussels sprouts to Dude? Will he laugh?


Pickled Brussels Sprouts
from Edible Wisconsin
makes 3 pints
This is a small batch but worth it. These sprouts have a tang with a hit of hot. A nice addition to a relish tray . . . or maybe a Bloody Mary! they're best used whole, but you can halve large ones.

! 1/2 pounds Brussels, sprouts (about 6 cups)
1 1/2 cups cider vinegar
1 1/2 cups water
4 teaspoons kosher salt
1 tablespoon sugar
1/2 teaspoon cardamom seeds
1/2 teaspoon fennel seeds
1/2 teaspoon mustard seeds
1/2 teaspoon red pepper flakes
1/2 teaspoon whole peppercorns
3 garlic cloves, sliced

Sterilize 3 pint-sized canning jars and lids

Bring a large pot of water to boil and blanch Brussels sprouts for about 2 minutes. Immediately drain and submerge in ice water to cool.

Meanwhile, combine vinegar, water, salt and suagr in a medium saucepan and bring to a boil.

Turn down heat and boil for about 3 minutes, stirring until salt and saugar are dissolved. Turn off heat.

Drain Brussels sprouts and pack evenly among the three jars. EVenly distibute the spices andgarlic among the jars, too.

Carefully pour the brine in the jars to 1/2 inch below the top of the jars. Screw on lids.

For refrigerator pickles, let cool to room temeprature then put in fridge. Wait a few days before opening (if you can.) Should keep about one month in the fridge.

For canned pickles, process the jars in a boiling hot water bath for 10 minutes. Remove and let cool. Wait a few days before opening. Will keep indefinitely.

Sunday, October 27, 2013

Pumpkin Spice Crunch Cupcakes with Cream Cheese Filling -- A Mouthful of a Story!


Some of us are bakers and some of us are cooks. Few of us are really good at both. (Although I know quite a few who are!) And then there are some -- like me -- who refuse to admit that it doesn't make any sense that a good cook can't be a good baker -- so I continue to bake, mistake after mistake, failure after failure.

And once in a blue moon a mistake blooms into a roaring success! Case in point: these cupcakes.


It's a long story; I'll (try to) keep it short.  Since cheesecake is one dessert I can bake successfully time after time, I planned to make one for my sister-in-law's birthday party. A maple walnut cheesecake, to be precise. (It was scrumptious.)


But even cutting it into 16 pieces wouldn't be enough for the expected crowd, so I planned to make cupcakes, too. Not ordinary cupcakes, mind you. The "creative" baker in me was going to experiment. In cooking, that's not something I'm unaccustomed to doing. Baking? Another story.

I had some canned pumpkin pie filling lurking in the pantry. (A mistake purchase; meant to grab plain ol' pumpkin. Got the "filling" instead in a blind reach.) Found a cake recipe that called for using pumpkin pie filling. So far, so good. But to make it special, to put my imprint on it, I decided to fill the cupcakes with cream cheese, a method I'd used several times making these pumpkin cream cheese muffins.

I made a couple other additions, subtractions, deletions to the original recipe, and popped these babies in the oven.

Testing for doneness was a little tricky for me, because of the creamy filling and the crunchy topping. So I trusted my own experience with my oven and took them out two minutes early. I let them cool just a bit. Still warm,  I tore one apart to test. "Hmmm," I say to self, "still too gooey. Either they're not done, or just still warm."

Although panic had not yet set in -- the gathering was still a few  hours away -- I was stymied for Plan B. Just then, the phone rang. It was my friend Susie suggesting that she bake something extra for the birthday. Was she psychic? Had she eavesdropped on my near-panic? What a godsend! Hallelujahs all over the place! Bless you, Susie! I did not tell her my tale of baking woe and simply said, "Great idea!"

Later that evening, everyone was delighted with both my cheesecake and Susie's spice cake. The next day, my daughter was visiting and casually asked about the cupcakes she spied.


"Oh, those, " I said, "I'm afraid they 're a mistake. I tried to get creative and it they didn't turn out so swell. Wanna try one?"

Amy pronounced them delicious and I had to try myself then. They were delicious! They just needed a little cooling, time to set up.

So a basic cooking lesson I learned long ago was reinforced. Never make something brand new for a special occasion. If you do, have a good friend as a back-up.

Pumpkin Spice Crunch Cupcakes 
with Cream Cheese Filling
adapted from verybestbaking.com
makes 24 cupcakes

8 ounces cream cheese, softened
2 tablespoons confectioner's sugar
1 package spice cake mix, divided
2 large eggs
1 2/3 cup pumpkin pie filling
1 teaspoon cinnamon
1/2 teaspoon ground cloves
1/2 teaspoon ground ginger
1/3 cup flaked coconut
1/4 cup chopped walnuts
4 tablespoons butter, softened

About two hours before baking, mix the cream cheese and sugar well. waxed paper, form a log about 12 inches long. Using the waxed paper to help, roll the log into a tube. Wrap again with foil, and pop in the freezer for at least two hours until firm.

When ready to bake, preheat the oven to 350 degrees F. Prepare muffin pans by lining with paper cups, or using non-stick spray.

Combine 3 cups only of the cake mix (saving the rest for the topping), eggs pumpkin pie mix and the spices in a large mixing bowl. Mix on low speed until moistened. t\Then beat on medium speed for 2 minutes.place about one tablespoon of batter into prepared muffin pans. Take the chilled cream cheese log from the freezer and cut into 24 slices. Place one slice in each cup. Then pour the rest of the batter evenly among the muffin
pans.

Combine the reserved cake mix, coconut and nuts in small bowl. Cut in the butter with a pastry blender and sprinkle over batter.  Bake 15 to 20 minutes. Let cool completely on wire rack.

Friday, September 6, 2013

Blueberry Crumb Bars, Blueberry Crumb Bars | Well Worth Repeating


I've been holding out on you -- I've been making these Blueberry Crumb Bars all summer, ever since our first blueberries ripened in late June. Every. Single. Week. Mr. Rosemary likes them that much. (So do I.) And I have enough in the freezer to make, oh, I'd say enough for a weekly batch through January!

And I took a pan of these to the family's annual Labor Day get together, an appropriate official end to summer. And everyone loved them there, too. Even my brother (who boned up on reading my blog before our get together said I should put these up on the blog: "You haven't been posting there much lately," he said.)

And when my eight year old cooking student took them to a friend's home for dinner he got a thank you note and a request for the recipe!

I have found this recipe in a lot of places, so whoever first created it gets no credit! I first found these via the Brown Eyed Baker. She attributed them to Smitten Kitchen, who wrote that she first got the recipe from all recipes.com.  I liked Smitten Kitchen's the best, because it used all butter as the shortening and included a good touch of lemon, both in the blueberry mixture and the crust. So that's the one I used. (And used and used and used.)

Maybe you'll become a blueberry crumb bar junkie, too, after you try these. They're pretty simple, oh-so-good, and can be a great dessert, a nice snack, or a complement to a breakfast spread.

But Mr. Rosemary will suggest that you warm these up a little and add a dollop of Cool Whip.  And I might add, Cool Whip might do in a pinch but real whipped cream is so much better!

Blueberry Crumb Bars
Yield: I cut these into 36 smallish rectangles
1 cup white sugar
1 teaspoon baking powder
3 cups all-purpose flour
1 cup cold unsalted butter (2 sticks)
1 egg
1/4 teaspoon salt
Zest and juice of one lemon
4 cups fresh blueberries
1/2 cup white sugar
4 teaspoons cornstarch

1. Preheat the oven to 375 degrees F.  Grease a 9×13 inch pan.
2. In a medium bowl, stir together 1 cup sugar, 3 cups flour, and baking powder. Mix in salt and lemon zest. Use a fork or pastry cutter to blend in the butter and egg. Dough will be crumbly. Pat half of dough into the prepared pan.
3. In another bowl, stir together the sugar, cornstarch and lemon juice. Gently mix in the blueberries. Sprinkle the blueberry mixture evenly over the crust. Crumble remaining dough over the berry layer.
4. Bake in preheated oven for 45 minutes, or until top is slightly brown. (This took an extra 10 to 15 minutes in my oven.) Cool completely before cutting into squares.


Saturday, July 27, 2013

Love Knots | Soft Hot Buttered Pretzels


If you had to choose between an Alton Brown recipe and a King Arthur Flour recipe for soft pretzels, what would you do?

Tough choice.After all, Alton Brown is almost as exhaustive as Christopher Kimball when it comes to figuring out the very best way to make something.

On the other hand, when you're baking, what better authority than the royalty of  King Arthur Flour?

Although nearly a toss-up, in the end I chose the King Arthur Flour recipe because it seemed just a tad simpler and, since this was to be a  lesson with my little 8 year old cooking student, simpler was the way to go.

With school out for the summer, Wyatt and I had plans to make "bread" things since we had more time than during the school year.

We started with a quick bread.  Then moved on to sweet rolls. But to make things interesting (and educational) we conducted our own little experiment.

We made a "quick sweet roll," a recipe that used just baking powder instead of yeast. His job was to take both versions homes and test them out. I was surprised that the "quick" sweet roll -- an America's Test Kitchen recipe --  beat out the traditional yeast rolls. (And I forgot to get pictures before Wyatt took them all home!)

So we moved on to these pretzels -- if I knew that they were this easy -- and fun -- to make, I would have made them a long time ago.

With this success under our belt, we may move on to regular, real bread!


Soft Hot Buttered Pretzels
2 1/2 cups flour
1 teaspoon salt
1 teaspoon sugar
2 1/4 teaspoons instant yeast
7/8 to 1 cup warm water*
1 cup boiling water
2 tablespoons baking soda
coarse, kosher or pretzel salt, optional
3 tablespoons unsalted butter, melted
*Note from KAF Bakers: Use the greater amount in the winter, the lesser amount in the summer, and somewhere in between in the spring and fall. Your goal is a soft dough.


  • To make dough by hand, or with a mixer: Place all of the dough ingredients into a bowl, and beat until well-combined. Knead the dough, by hand or machine, for about 5 minutes, until it's soft, smooth, and quite slack. Flour the dough and place it in a bag, and allow it to rest for 30 minutes.
  • While the dough is resting, prepare the topping: Combine the boiling water and baking soda, stirring until the soda is totally (or almost totally) dissolved. Set the mixture aside to cool to lukewarm (or cooler).
  • Preheat your oven to 475°F. Prepare a baking sheet by spraying it with vegetable oil spray, or lining it with parchment paper.
  • Transfer the dough to a lightly greased work surface, and divide it into eight equal pieces (about 70g, or 2 1/2 ounces, each).
  • Allow the pieces to rest, uncovered, for 5 minutes. Pour the baking soda/water into a inch square pan.
  • 8) Roll each piece of dough into a long, thin rope (about 28" to 30" long), and twist each rope into a pretzel. Working with 4 pretzels at a time, place them in the pan with the baking soda/water, spooning the water over their tops; leave them in the water for 2 minutes before placing them on the baking sheet. This baking soda "bath" will give the pretzels a nice, golden-brown color.
  • Transfer the pretzels to the prepared baking sheet. Sprinkle them lightly with coarse, kosher, or pretzel salt, if desired. Allow them to rest, uncovered, for 10 minutes. (We sprinkled half of our pretzels with cinnamon sugar, half with salt. Sugar for Wyatt, salt for me.)
  • Bake the pretzels for 8 to 9 minutes, or until they're golden brown.
  • Remove the pretzels from the oven, and brush them thoroughly with the melted butter. Keep brushing the butter on until you've used it all up; it may seem like a lot, but that's what gives these pretzels their ethereal taste. Eat the pretzels warm, or reheat them in an oven or microwave.
Makes 8 large pretzels.