Monday, November 10, 2014
DIY Velveeta | Better Than the "Real" Thing
With all due apologies to Kraft, I never liked Velveeta. As a child, I never remember having Velveeta in the house. Once when I visited a friend's house and watched her mother make macaroni and cheese with this rubbery block of orange stuff, I was less than impressed. But when I tasted the finished dish, I certainly was. It was rich, smooth, creamy and cheesy. All good.
When I went home and shared the story with my mother, she was less than impressed. She just said something like, "Oh, honey, that's not real cheese."
But every once in a while, I'd eat something and find out that it had Velveeta in it and decided I should be a little more open-minded, less snobbish about my cheese preferences - although I've never met a cheese I didn't like.
And while I certainly enjoyed whatever cheesy something I was tasting, a part of me still harbored some kind of mistrust about a cheese you can pick up off a shelf, not from a refrigerated case.
That's why I was so delighted to happen upon this "how to" from Pittsburgh blogger The Brown Eyed Baker. When I scanned the list of ingredients, I thought to myself, "Hmmm . . . . cheese jello."
What intrigued me even more was that TV food celebrity Michael Symon apparently developed the recipe after there was a rumored shortage of Velveeta in the northeast earlier this year. Imagine! A world without Velveeta ;)
If you'd like to read all about how "cheese food" is made, read this piece.
But I could not resist trying it. And it worked and it works in recipes like this from Brown Eyed Baker. Always a crowd pleaser. And isn't that why we cook after all?
DIY Velveeta Cheese
from The Brown Eyed Baker
¼-ounce packet unflavored gelatin
6 tablespoons dry milk powder
1 cup boiling water
16 ounces mild cheddar cheese, shredded
Line a small loaf pan with plastic wrap, covering all sides and leaving excess to hang over the sides.
Place the unflavored gelatin and dry milk powder in a blender or food processor. Pour the boiling water over top and immediately pulse to combine. Add the cheddar cheese and puree the mixture until smooth.
Immediately pour and scrape the cheese mixture into the prepared loaf pan, smoothing it into an even layer with a spatula. Fold the excess plastic wrap over the cheese, pressing it against the surface of the cheese, ensuring that it is completely covered. Refrigerate for at least 12 hours, until set. The cheese will keep in the refrigerator, tightly wrapped in plastic wrap, for up to 1 month.
(Recipe from Michael Symon)
Wednesday, October 22, 2014
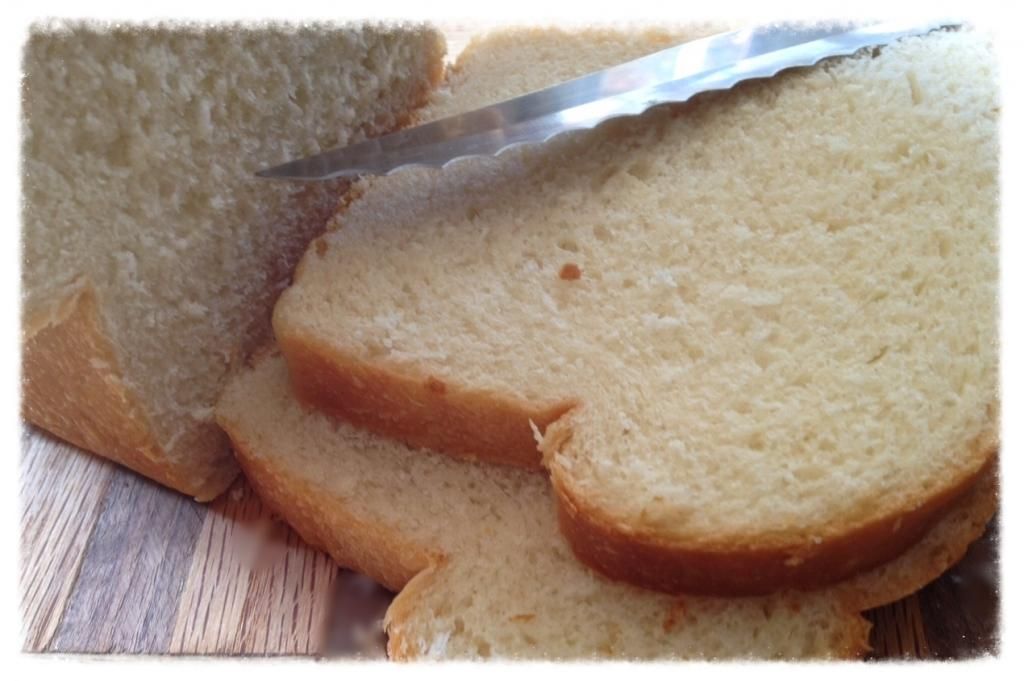
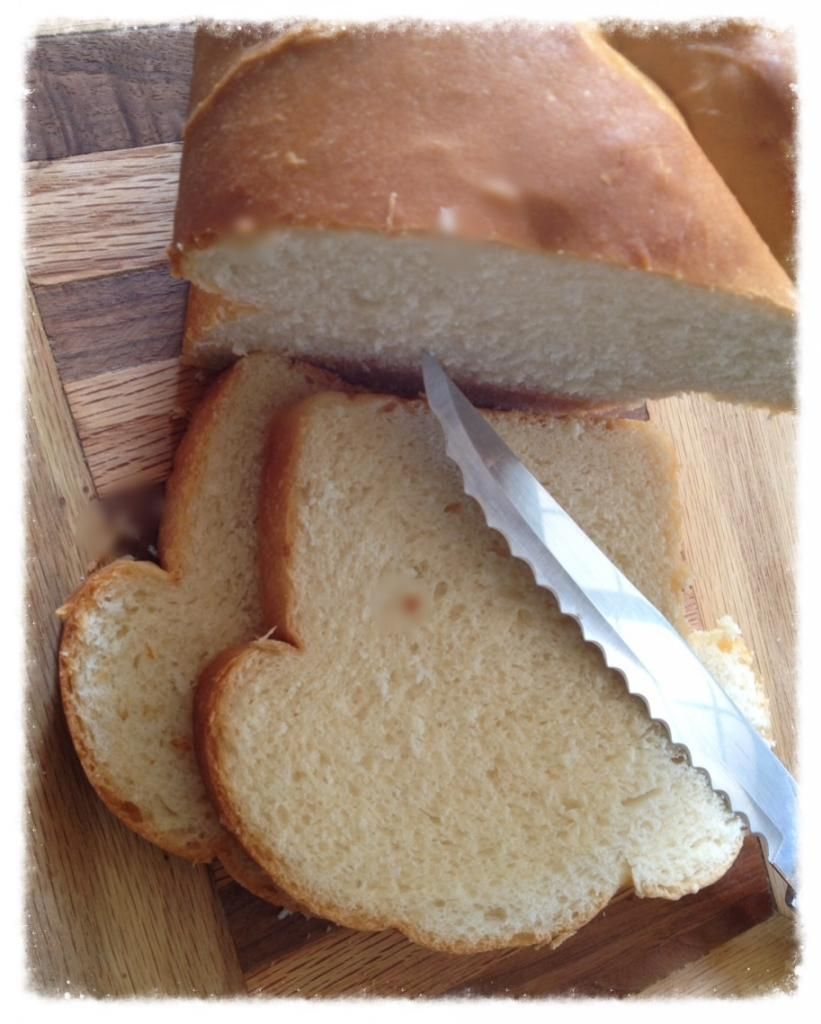
It's Only Bread . . . But I Like It!
I know I'm not alone when I say yeast intimidates me. After all my years of cooking and baking, making bread -- good bread, the kind that makes my husband swoon and say, "Honey, if only you could make bread like this!" -- still scares me. As careful as I am to measure, to test, to watch and wait, I still hold my breath when I open the oven door and wonder, "Is it going to be okay? Is it going to be another doorstop?"
I'm envious of all those who tell me it's so easy. (I suspect they're the same ones who say the same thing about pie dough. Call me suspicious.) And I've had a good share of encouragement. After I donated my bread machine to Goodwill in despair, Mr. Rosemary bought me a Kitchen Aid stand mixer with a dough hook. My neighbor took me into her kitchen and performed breadmaking alchemy in front of my very eyes.
Even my brother can whip up a mean loaf of challah. Spurred by that sibling rivalry, I decided I'd make it myself. I did. It was lovely. But I rested on my laurels too long, and didn't repeat the feat.
I've other other confrontations with yeast and fared pretty well. I can make pizza dough, and I've made focaccia with modest success, but I still lack a good track record. Hit and miss successes are all I can rack up.
I've decided to accept the gauntlet again -- this time, it's because of my 9 year-old cooking student. He wants to make bread badly. I've tried to reason with the boy. I tell him we really don't have time for that rising, and shaping and re-rising during our after school sessions. So we've made some quick breads and had a ball making soft pretzels.
Still . . . . it's BREAD he wants to make. So the teacher has to learn before she can teach. And what better source than King Arthur Flour?
I read and watched and listened and I did it. And even though I held my breath when I opened the oven, it was with a smile this time.
An old dog can learn new tricks. Thanks for the hand-holding, KAF.
The bread baking saga will continue . . .
Basic Bread
King Arthur’s Classic White Sandwich Bread
1 1/2 cups lukewarm water
1 heaping tablespoon honey
2 1/4 teaspoons instant yeast
1 3/4 teaspoons salt
2 tablespoons soft butter
4 cups all-purpose flour
1/2 cup nonfat dry milk granules
Mix all of the ingredients in the order listed, and mix and knead — by hand, or using a stand mixer — to make a smooth dough. It won't be particularly soft nor stiff; it should be smooth and feel bouncy and elastic under your hands.
Place the dough in a lightly greased bowl or other container. Cover it, and let it rise at room temperature until it's very puffy, 1 to 2 hours.
Gently deflate the dough, and shape it into a fat 9" log. Place it in a lightly greased 9" x 5" loaf pan.
Cover the pan, and let the dough rise for 60 to 90 minutes, till it's crowned 1" to 1 1/2" over the rim of the pan. Towards the end of the rising time, preheat the oven to 350°F.
Bake the bread for 20 minutes. Tent it lightly with aluminum foil, and bake for an additional 15 to 20 minutes, till it's golden brown. An instant-read thermometer inserted into the center will read 195°F to 200°F.
Remove the bread from the oven, and turn it out onto a rack to cool. When completely cool, wrap in plastic, and store at room temperature.
Yield: 1 large loaf, about 18 servings.
I'm envious of all those who tell me it's so easy. (I suspect they're the same ones who say the same thing about pie dough. Call me suspicious.) And I've had a good share of encouragement. After I donated my bread machine to Goodwill in despair, Mr. Rosemary bought me a Kitchen Aid stand mixer with a dough hook. My neighbor took me into her kitchen and performed breadmaking alchemy in front of my very eyes.
Even my brother can whip up a mean loaf of challah. Spurred by that sibling rivalry, I decided I'd make it myself. I did. It was lovely. But I rested on my laurels too long, and didn't repeat the feat.
I've other other confrontations with yeast and fared pretty well. I can make pizza dough, and I've made focaccia with modest success, but I still lack a good track record. Hit and miss successes are all I can rack up.
I've decided to accept the gauntlet again -- this time, it's because of my 9 year-old cooking student. He wants to make bread badly. I've tried to reason with the boy. I tell him we really don't have time for that rising, and shaping and re-rising during our after school sessions. So we've made some quick breads and had a ball making soft pretzels.
Still . . . . it's BREAD he wants to make. So the teacher has to learn before she can teach. And what better source than King Arthur Flour?
I read and watched and listened and I did it. And even though I held my breath when I opened the oven, it was with a smile this time.
An old dog can learn new tricks. Thanks for the hand-holding, KAF.
The bread baking saga will continue . . .
Basic Bread
King Arthur’s Classic White Sandwich Bread
1 1/2 cups lukewarm water
1 heaping tablespoon honey
2 1/4 teaspoons instant yeast
1 3/4 teaspoons salt
2 tablespoons soft butter
4 cups all-purpose flour
1/2 cup nonfat dry milk granules
Mix all of the ingredients in the order listed, and mix and knead — by hand, or using a stand mixer — to make a smooth dough. It won't be particularly soft nor stiff; it should be smooth and feel bouncy and elastic under your hands.
Place the dough in a lightly greased bowl or other container. Cover it, and let it rise at room temperature until it's very puffy, 1 to 2 hours.
Gently deflate the dough, and shape it into a fat 9" log. Place it in a lightly greased 9" x 5" loaf pan.
Cover the pan, and let the dough rise for 60 to 90 minutes, till it's crowned 1" to 1 1/2" over the rim of the pan. Towards the end of the rising time, preheat the oven to 350°F.
Bake the bread for 20 minutes. Tent it lightly with aluminum foil, and bake for an additional 15 to 20 minutes, till it's golden brown. An instant-read thermometer inserted into the center will read 195°F to 200°F.
Remove the bread from the oven, and turn it out onto a rack to cool. When completely cool, wrap in plastic, and store at room temperature.
Yield: 1 large loaf, about 18 servings.
Saturday, August 23, 2014
Massaged Kale Salad with Watermelon and Feta
Every year at Christmas, my sister gives me a can of anchovies. It's always prettily wrapped, although it used to be just stuffed in my stocking. After several years, I have a pretty respectable stack of the tins accumulated in my pantry.
I use the anchovies -- I do -- but I have to admit, as much as I like them, only occasionally, as I'm certainly the only one in this household who does. Eating a whole tin myself seems a little too much of a good thing.
And the people I cook for aren't likely anchovy candidates. I have not told them how I slipped anchovies into the filling for the cannelloni they all like. And I haven't told them that anchovies are a key ingredient in the Worcestershire sauce so liberally sprinkled on their burgers.
What is it about anchovies that turns so many people off? I know they're salty, a little bit fishy, and -- sometimes -- they do have little hairy spokes, but I think they're just great. (Which is why, of course, I get my annual pantry contribution.)
All this is a roundabout way of telling you how I put together this kale salad.
I've made kale salad a number of times and I use kale whenever I can instead of spinach in dishes I cook. But the combination of a great abundance of kale in our garden and the growing stack of anchovy tins taking up valuable real estate in my little pantry led me to a little exploring.
The first time I made massaged kale salad I used a recipe from Aarti Sequeria. I substituted the available nectarines for the mangoes she recommended and loved the dressing.
But always searching for another way of making something, I found an article from Eating Well, that described a dressing for kale salad using -- ta-da! -- anchovies! Perfect!
The pungency of the garlic and the subtle (really!) flavor of the anchovies was the ticket to solving my overabundance problems. The addition of the watermelon chunks was a refreshing balance to those flavors.
I like mixing things with my hands. Meatballs. Meatloaf. Pizza dough. Probably why I like this salad. It's a pleasurable feeling to massage the greens until they soften. Like my husband's shoulders.
If you really can't stand anchovies, you can leave them out, but if you haven't tried massaging kale into a fresh salad, I think you'll be surprised.
I write a monthly food column, "Good Food Matters," for a local newspaper and my most recent article I titled "Let Them Eat Kale!", a title I copied from a new cookbook by Julia Mueller. I'll have to get that book because I can't just eat massaged salad, kale chips or a kaled version of my spinach rice. It may not be a hit with a lot of my small town readers, but I hope I can convince a few more people about this great way to get a lot of good in your body.
I bet you're wondering what I did with the rest of the anchovies, aren't you?
Massaged Kale Salad with Watermelon and Feta
inspired by Eating Well and Aarti Sequeria
Serves 6
2 bunches kale
1/3 cup extra-virgin olive oil
1/4 cup lemon juice
3 large cloves garlic, minced
1 tablespoon reduced-sodium soy sauce
1 minced anchovy fillet or 1/2 teaspoon anchovy paste (optional, maybe)
2 cups watermelon cut in 1/2 to 1 inch chunks
1/4 cup feta cheese
1/2 teaspoon freshly ground pepper
1/4 teaspoon salt
Strip leaves from the stems and discard the stems. Wash and dry the leaves. Tear the leaves into small pieces and place in a large bowl. Add oil, lemon juice, garlic, soy sauce, anchovy (if using), pepper and salt. With clean hands, firmly massage and crush the greens to work in the flavoring. Stop when the volume of greens is reduced by about half. The greens should look a little darker and somewhat shiny. Taste and adjust seasoning with more lemon juice, garlic, soy sauce if you want. Add the watermelon chunks and the feta and enjoy.
Labels:
kale,
kale salad
Wednesday, July 9, 2014
A Summer Surprise Salad | Lemony Macaroni Salad with Peas and Bacon
No one was more surprised than I was that this light and lemony macaroni salad was well received when I took it to a Fourth of July party last week. I knew that I would like it, but when people started asking for the recipe, I was pleasantly surprised, even though I was counting on taking home leftovers to feed us over the rest of weekend.
When I make a traditional macaroni salad, it's loaded with eggs, sour cream and mayonnaise. This version is still creamy but it has a distinct lemony flavor that makes it light and tangy.
There's a lot of lemon in the dressing --1/4 cup of juice and I 1/2 tablespoons of lemon zest. That's about two lemons. And except for grating the zest and squeezing the juice, this was very easy to put together.
The original recipe, from The Cozy Apron
This is a very pleasant change from typical pasta and macaroni salads. I hope you try it.
Lemony Macaroni Salad with Peas and Bacon
from The Cozy Apron
Serves about 6
12 ounces ditalini pasta, cooked al dente and cooled
1 cup frozen petite peas, thawed
4 slices bacon, diced and crisped bacon
For the dressing:
¾ cup mayo
1/3 cup olive oil
¼ cup fresh lemon juice
1 ½ tablespoons lemon zest
1 tablespoon plus 2 teaspoons sugar
1 ½ teaspoons salt
1 teaspoon whole grain Dijon mustard
1/2 teaspoon dried thyme leaves
½ teaspoon freshly cracked black pepper
To make the dressing, put all the ingredients in a food processor and process until the mixture is thick and creamy. Store in the fridge until you're ready to serve the salad
Friday, May 9, 2014
"World's Best Tzatziki" -- Amen to That!
While the rest of the world was making chicken mole and perfecting guacamole earlier this week for Cinco de Mayo, I was going Greek with "The World's Best Tzatziki" courtesy of Kalyn's Kitchen.
I first made this tasty condiment a few years ago, when Kalyn first posted it. Usually I make it with dill, as Kalyn originally posted it -- and dill is the most traditional herb used in tzatziki.
But I had a mint plant sitting on my kitchen window sill that was dying a slow death and a couple of cucumbers likewise languishing in the fridge. The reason my stewardship of food was slacking was the god awful cold that kept me and Mr. Rosemary down for nearly a week, each unable to comfort or nurse the other very well.
Still, my awareness of the state of the mint and cucumbers (and my deep-seated frugality) spurred me to gather what little energy I had and make this tzatziki. (Great name, isn't it? If only you could pronounce it!)
tsætˈsɪkɪ
Kalyn is quick to credit her Greek friend Georgette for introducing her to this version of tzatziki. Basically, tzatziki is a mixture of yogurt and cucumber, flavored with dill, lemon and garlic. It's the usual condiment for gyros and is a great companion for lamb (or any grilled meat or fish.) It makes a great dip for crudites and I even used it as a salad dressing, a refreshing replacement for the ubiquitous ranch.
It takes a little time to make -- mostly because the cucumbers need to be drained so you don't end up with a watery sauce. Other than that, the food processor does the work. Just like my hummus.
"The World's Best Tzatziki"
only slightly adapted from Kalyn's Kitchen.
2 medium cucumbers, seeded, drained and diced
3 cups plain Greek Yogurt (or regular plain yogurt, strained) as
described above)
juice of one lemon (about 3 T)
1 garlic clove, chopped
about 1 T kosher salt -- for salting and draining the cucumbers
1 T finely chopped fresh mint (can substitute mint leaves for a slightly different version)
Kosher salt and fresh ground black pepper to taste
Cut the cucumbers in half lengthwise and scrape out seeds. Discard seeds. Slice cucumbers, then put in a colander, sprinkle on 1 T salt, and let stand for 30 minutes to draw out water. Drain well and wipe dry with paper towel.
Pllace the cucumbers, garlic, lemon juice, dill, and a few grinds of black pepper in the food processor, fitted with the steel blade.. Process until well blended, then stir this mixture into the yogurt. Taste before adding any extra salt, then salt if needed. Place in refrigerator for at least two hours before serving so flavors can blend. (This resting time is very important.)
This will keep for a few days or more in the refrigerator, but you will need to drain off any water and stir each time you use it.
juice of one lemon (about 3 T)
1 garlic clove, chopped
about 1 T kosher salt -- for salting and draining the cucumbers
1 T finely chopped fresh mint (can substitute mint leaves for a slightly different version)
Kosher salt and fresh ground black pepper to taste
Cut the cucumbers in half lengthwise and scrape out seeds. Discard seeds. Slice cucumbers, then put in a colander, sprinkle on 1 T salt, and let stand for 30 minutes to draw out water. Drain well and wipe dry with paper towel.
Pllace the cucumbers, garlic, lemon juice, dill, and a few grinds of black pepper in the food processor, fitted with the steel blade.. Process until well blended, then stir this mixture into the yogurt. Taste before adding any extra salt, then salt if needed. Place in refrigerator for at least two hours before serving so flavors can blend. (This resting time is very important.)
This will keep for a few days or more in the refrigerator, but you will need to drain off any water and stir each time you use it.
* You can peel the cucumbers. I didn't; just washed them well. I liked the additional color and texture.
Labels:
tzatziki
Thursday, April 24, 2014
The Yin and Yang of Hummus | Roasted Red Pepper and Garlic Hummus
There are a few ready-made foods I will buy at the store -- and hummus is one of them. It's a quick and easy snack to have on hand for impromptu company -- except if it's my brother-in-law Bob. Although I was sure that there was no food on earth that Bob wouldn't like, he can't stand hummus. He must have had a bad first experience.
I tried to convince Bob that the real deal -- made from scratch with dried chickpeas, fresh garlic, and roasted red peppers -- was infinitely better. Although he gamely tried it, he still made a horrible face and was proud that at least he tried it.
Don't worry, Bob, I take no personal offense ; )
And even though homemade hummus using canned chickpeas is still much better than store-bought, taking the extra time to soak and cook dried chickpeas makes a world of difference. And my brand-new food processor (Thanks, Amy!) makes it a snap to make. You can keep some nice little chunks of chickpeas in the mixture.
My only problem is finding tahini locally. (Thanks, Amazon.)
My next biggest problem is choosing what kind to make. I hate to make a whole batch of just one flavor, since I am the only one at home who likes it. (Mr. Rosemary is in the same anti-hummus camp as Bob. The only food he thinks is worse is tofu, fondly referred to as toad food around here.)
So I divide up my basic garlic hummus and add jarred roasted red peppers to it. I suppose if I was totally true to my "homemade is better" credo, I'd roast the peppers myself, too, but I have to draw the line somewhere for this self-indulgent treat.
I'll spread hummus on my morning toast or spread a layer on a tortilla when making a quick wrap for lunch.
So buy yourself some dried chickpeas and tahini and make this.
And if you're really ambitious, the perfect dipper would be homemade pita chips. (Yes, I bought these.)
By the way, I love Mark Bittman's book, How to Cook Everything. I even have the app for my iPhone, and use it especially for things like checking times for roasting eggplant or making stir fry. I don't really consult it for recipes, but for reminders about cooking basics.
Basic Hummus
from How to Cook Everything
2 cups drained well-cooked chickpeas
1/2 cup tahini
1/4 cup extra virgin olive oil
2 cloves garlic (although I usually use at least 3!)
juice of one lemon
1 tablespoon ground cumin
Salt and freshly ground black pepper, about 1/4 teaspoon each
Whir everything together in the food processor until you have it as smooth as you want it.
Add a little water a little at a time if it's too thick.
To make roasted pepper hummus, add two roasted peppers to the food processor. To make my "yin and yang" version, I usually halve the hummus before adding any water and add the red peppers to the remaining hummus in the bowl. The peppers retain some moisture so they really don't need any more. To the "plain" hummus I then just stir in some water.
Labels:
appetizer,
hummus,
roasted red pepper
Thursday, March 27, 2014
Spring Is Late? Have Some Stuffed Pepper Soup
There's no use complaining about the weather, is there? Still, we do.
After living in western Pennsylvania for most of my life, I should be used to long and cold winters. And I guess I am.
Usually, come February, I ache to be able to mow the yard or weed the garden. (Let's see if I remember that in June.)
And now it's the end of March, and we're still mucking frozen horse sh*t in the barn every morning and pounding frozen water out of the drinking buckets.
Enough is enough. It has been one, l-o-o-o-n-g winter. And so, we complain. Mr. Rosemary said:
"We just have two seasons: winter and non-winter."Let's just suck it up and remind ourselves that spring will come. Or maybe we'll just go straight into summer.
At any rate, these cold days are great excuses to make hearty, comforting soups -- like this stuffed pepper soup.
I have to admit, I'd never made stuffed pepper soup before, mostly because Mr. Rosemary isn't a fan of stuffed peppers in the first place. I reasoned, though, if he likes chili, he's got to like this, too.
He loved it. And while it was good, I thought it needed a little something more. I've been advised, though, not to change a thing.
And so I won't.

Stuffed Pepper Soup
adapted from All Recipes
makes about 8 servings
2 pounds ground beef (or turkey; I used a mix of ground beef and venison)
1 green pepper, chopped
1 sweet onion, chopped
1 15 ounce can tomato sauce }I used the equivalent of my own
1 15 ounce can diced tomatoes, with juice }tomato sauce which is pretty chunky!
2 cups beef broth
1/4 cup brown sugar
2 teaspoons salt
1 teaspoon ground black pepper
1 teaspoon soy sauce
2 cups cooked white rice
Shredded cheddar cheese, for serving
In a soup pot or Dutch oven, brown the meat over medium heat for about 5 minutes and drain off any fat.
Add the chopped pepper and onion and cook for 3 to 5 minutes until the they're softened. Add all the remaining ingredients -- except the rice -- and simmer, covered for at least 20 or 30 minutes. Then add the cooked rice and heat through. Serve topped with shredded cheddar cheese.
Labels:
soup,
stuffed pepper soup
Subscribe to:
Posts (Atom)