Wednesday, September 14, 2011

The Last Roast of Summer: Island Pork Tenderloin Salad


If you want to savor summer one last time, make this pork roast salad.  It looks like a lot of ingredients – and there are – but, remember, it’s a whole meal.

Actually, you could make it anytime this winter, whenever you want to be reminded that there is a sun and there are warm places out there, because it’s all cooked indoors.  A little stove top searing of the meat, a little roasting and then the salad assembly. 

This meal combines the warmth of the pork (and its spicy seasonings) and the cool freshness of the citrus pieces and the creaminess of the avocado.  All just plain yummy. 

I love fall; it’s my favorite season. And I love September best of all.  (Did you know that when people are asked what their favorite month is 9 out of 10 people will pick their birthday month?  I feel sorry for January birthday people.)

Still, I don’t like what’s ahead.  It seems like winter lasts six months around here.  I’m glad to know I have my daughter in Tampa to visit!

Remember this dish when you want a taste of a winter getaway.  It just may transport you.


Island Pork Tenderloin Salad
Gourmet May 2003

For pork:
2 teaspoons salt
½ teaspoon black pepper
1 teaspoon ground cumin
1 teaspoon chili powder
1 teaspoon cinnamon
2 pork tenderloins (2 ¼ to 2 ½ pounds total)
2 tablespoons olive oil

For glaze:
1 cup packed dark brown sugar
2 tablespoons finely chopped garlic
1 tablespoon Tabasco

For vinaigrette:
3 tablespoons fresh lime juice
1 tablespoon fresh orange juice
1 tablespoon Dijon mustard
1 teaspoon curry powder, toasted
½ teaspoon salt
¼ teaspoon black pepper
½ cup olive oil

For salad:
3 navel oranges
5 ounces baby spinach, trimmed (6 cups leaves)
4 cups thinly sliced Napa cabbage (from 1 medium head)
1 red bell pepper, cut lengthwise into thin strips
½ cup golden raisins
2 firm-ripe avocados

Preheat oven to 350 degrees F.
Stir together salt, pepper, cumin, chili powder and cinnamon, then coat pork with spice rub.
Heat oil in an ovenproof 12-inch heavy skillet over moderately high heat until just beginning to smoke, then brown pork, turning, about 4 minutes total.  Remove pan from heat but leave pork in skillet.
Stir together brown sugar, garlic and Tabasco and pat on top of each tenderloin.  Roast in the middle of the oven until thermometer inserted diagonally in center of each tenderloin registers 140 degrees F, about 20 minutes.  Let pork stand at room temperature 10 minutes.  (Temperature will rise to about 155 degrees F while resting.)
Make vinaigrette while pork roasts.  Whisk together juices, mustard curry powder, salt and pepper, then add oil in a stream, whisking until emulsified.
Prepare salad ingredients while pork stands.  Cut peel, including white pith, from oranges with a sharp knife, then cut oranges crosswise into ¼ inch thick slices.  Toss spinach, cabbage, bell pepper and raisins in a large bowl with about ¼ cup vinaigrette.  Halve, pit and peel avocados, then cut diagonally into ¼ inch slices.
Cut pork at a 45-degree angle into ½ inch slices.  Line a large platter with dressed salad and arrange pork, oranges and avocados in rows on top.  Drizzle some vinaigrette over avocados and oranges.  Pour any juices over pork.


Wednesday, September 7, 2011

B is for Blondie Brownies with Brown Butter from "The Cookiepedia"


Now that’s a tongue twister, isn’t it?  But a darn good taste tempter, too!  The recipe for these brownies came from a new cookbook, The Cookiepedia, by Stacy Adimando.  The subtitle of the book is “Mixing, Baking and Reinventing the Classics” and the book delivers on the promise.

The book also has a stylish, light-hearted design, a hard cover spiral bound book, with clever pencil drawings, lively writing and lovely photographs, too.  Every cookie is pictured.  Baker’s tips are sprinkled throughout the book, along with suggestions for making personalized versions.

This blondie is just one example:  A simple change from a traditional blondie by using brown butter adds a nutty flavor to the brownies that takes it up a notch. 

(A few years ago when one sister’s only son was graduating high school, many if not all stops were pulled out to fete the young man properly, including replicating his favorite dessert:  the blondies from Applebee’s where he worked at the time.  My sister found the recipe all right; he was pleased, they were delicious, but you ought to try these on him, too, Jiggy.)

I used to think, non-baker that I am, that brown butter was reserved for savory dishes, like a simple sauce for steamed vegetables, or with sage, a great topping for squash ravioli.

But I’ve opened myself up to the possibilities of baking with brown butter – or beurre noisette, as the French call it.

The book is cleverly organized, too, dividing the cookies into the major categories of buttery, chocolaty, fancy, fruity, spicy and nutty and seedy cookies.  You’ll find all the classics – snickerdoodles, pignoli cookies, macarons, Florentines, pecan sandies, shortbreads, linzers, chocolate chip – along with some newbies, like green tea, cornmeal, sesame crisps, salt-and-pepper cookies, and everything-but-the-kitchen-sink cookies (which suggests adding potato chips, among other things).
The book is both a primer, because there are lots of term descriptions and ideas for decorating, and an advanced course, because it offers lots of suggestions for taking the original recipes on slightly different taste trails.  Along with suggested options, there are lots of tips for successful baking, much needed for hard cases like myself.   If I were to make every one of the 50 recipes in the book, I’d be one cookie queen.

The addition of brown butter to the blondies did add a wonderfully nuttiness to the brownies.  Such a simple change can make a big difference!  But the cookie I really want to try are alfajores, little buttery, sandwich cookies filled with dulce de leche.  Although Stacy suggests purchasing the dulce de leche, I think, come Christmas, I’d like to make it myself. 

Or maybe it’s the cornmeal cookies with rosemary I’ll be making next.  Or the sables with lemon zest. Hard to say.

The author is the deputy lifestyle editor for Every Day with Rachel Ray and a contributor to Serious Eats.  She knows her cookies and has put together a pretty complete cookie book.  It went on sale September 6.  Some great early Christmas shopping!

Couple cautions with these blondies, though:  Do not multi-task when browning the butter.  It doesn’t take long.  Elise at Simply Recipes offers a great tutorial.  And do err on the underside of bake times.


Blondie Brownies with Brown Butter
From The Cookiepedia, by Stacy Adimando
Makes 2 dozen bars
1 cup unsalted butter
2 cups all purpose flour
1 teaspoon baking powder
1 teaspoon salt
1 ½ cups light brown sugar
½ cup sugar
2 eggs
1 ½ teaspoons vanilla extract
2/3 cup chocolate chips
2/3 cups toasted pecans, chopped
Coarse salt (sea salt or kosher) for sprinkling
(Optional)

Preheat oven to 350 degrees F.

Start by browning the butter.  Melt it in a saucepan on medium heat.  When the foaming subsides, start swirling the pan to keep the butter moving.  Continue to cook until it changes from a light yellow to a deep golden, stopping just when you see the color change happen.  Take it off the heat and pour into a bowl to cool.

Meanwhile, sift the flour, baking powder and salt into a bowl and set aside.

Beat the melted butte and sugars together.  Add eggs and vanilla and beat for several minutes or until the mixture looks thick and silky.  Add the dry ingredients one third at a time and mix until combined.  Stir in the chocolate chips and mix until combined.  Stir in the chocolate chips and pecans.

Grease a 9 X 13 inch baking pan.  Line the bottom of the pan with parchment paper, then grease the parchment paper.

Pour the dough onto the parchment paper and spread it evenly with a spatula or slightly wet hand.  Bake 30 to 35 minutes (err on the shorter side for doughier brownies) until a toothpick inserted in the center comes out clean.

Sprinkle lightly with the coarse salt.  Let cool completely before removing from the pan.  Cut into squares.

* * * *
Thanks to Quirk Books for sending me a copy of Stacy Adimando's The Cookiepedia.


Monday, August 29, 2011

Olives, Anyone? Everyman's Olive Cheese Bread

When it comes to olives, I’ve learned, there are two camps of people: They either love ‘em or they hate ‘em. Then there are some who say that they like the green ones, but not the black ones (or vicey versey.) It matters not with this cheesy bread. Even avowed olive haters have converted when they taste a bite of this bread . . . and they’ll be back for more.

I do believe, though, that all the heart-healthy benefits of the good fat in olives are totally eclipsed by the butter, cheese and mayo that go into the making of this artery clogging treat. But want to be a hit at the Labor Day picnic this weekend? Take this bread.

The recipe comes from The Pioneer Woman*. When she writes about it in her first cook book (and on the website) she labels it “chick food” because she served it an all-woman dinner she hosted and was besieged with requests for the recipe, more so than for all the other dishes on the menu, which included beef. (She also notes that her meat-loving Marlboro Man wouldn’t touch it with a ten-foot cattle prod.)

But after serving this bread several times, I’ve found there is no sexual bias. Man and woman both enjoy drooling over the melty cheese. The olives seem to merely add a saltiness and definite color to the bread topping. It’s very simple, very tasty and pretty much a crowd pleaser. Even if it is just a once-in-a-blue-moon-because-I-want-to stay-healthy-treat. Hate olives? Give it a try. And don’t bother getting deli olives; the ones in the can will do just fine.

There are only two slight changes I have made with this bread. I use a Monterey Jack cheese that has jalapeno peppers in it and I’ve extended the original cooking time by 15 minutes; could just be my oven, or my taste. I want a little browned toastiness to the edges of the bread and cheesy topping.

* I forgot to set the DVR to catch The Pioneer Woman’s new show on The Food Network last Saturday morning. Did anyone catch it?

Olive Cheese Bread
only slightly adapted from The Pioneer Woman
Serves 12

1 loaf French bread
1 14.5 ounce can black olives, drained
1 6 ounce jar pimiento stuffed green olives, drained
2 stalks of green onions
¼ pound (1 stick) butter
½ cup real mayonnaise
1 pound Monterey Jack cheese grated

Preheat oven to 325 degrees Fahrenheit.

Roughly chop both olives and green onions. In a large bowl, mix olives and onions with softened butter, mayonnaise and cheese

Cut bread in half lengthwise. Divide mixture in half and spread over each half. It looks like a lot, but it will work.

Bake for 40 to 45 minutes. Slice and serve.

Wednesday, August 24, 2011

A Dilly of a Potato Salad


There’s really nothing terribly remarkable about this potato salad, pretty standard fare. Except for the fact that it is now my own, perfected after years of experimenting and tinkering and fine tuning. And except for the fact that most of the ingredients come from, if not my own garden, my neighbor’s down the road. The satisfaction factor goes way up when your own produce stars in your food. My own dill, my own onions, and my neighbor’s spuds and eggs. Makes for one fine (and dilly of a) potato salad.

I’ve had so much dill this summer that I took to bringing flowering stalks of it and putting it in the kitchen window. What a refreshing fragrance! And so pretty, too. Plus cutting the flowers saved me from seeing those flowers spreading their seed all over the garden. And although dried dill weed also works in this salad, there’s nothing like fresh.

It’s the pureeing of the onion that really makes this salad, though. If you’re not a big dill fan, the dressing works well without it; you may have to add more seasoning, though. (And definitely some chopped Italian parsley.) Enough onion juice helps to thin the mayo and sour cream a little and the onions are so fine, you’re never really biting into raw onion, but the flavor is definitely there.


The onion secret is one I learned from my mom. She was a fan of grating a small amount of onion into things -- casseroles, soups, salads. (“They won’t taste the onion, honey. They’ll just know it tastes good.”) My 12 year-old self crying at the box grater wasn’t so sure!

Toes’*  Dilled Potato Salad

3 pounds red potatoes
2 tablespoons kosher salt
1 small white onion
1 cup mayonnaise
1 cup sour cream
¼ cup fresh dill, chopped
3 hard-cooked eggs, chopped
½ cup celery, chopped
Salt and pepper to taste

Place the potatoes in a large pot covered with water. When the water comes to a rolling boil, add 2 tablespoons kosher salt, lower the heat to a simmer and cook about 15 minutes, until a fork pierces about a third of the way into the potato. Drain the potatoes in a colander and then place the colander back over the now dry pot. Cover with a clean, dry kitchen towel and let steam for about 15 to 20 minutes. (I learned this tip from Ina Garten.)

Meanwhile, make the dressing. In a food processor, place the onion, cut up into manageable pieces and nearly make a puree out of it. Add the mayo and sour cream and the dill and whirl until blended.

When the potatoes are cool enough to handle, cut up into about ¾ inch pieces. Add the dressing, eggs and celery and gently mix together. Taste and add as much salt and freshly ground pepper as you like.
Chill for several hours before serving.

* I guess I should explain the “Toes” thing – it’s just a family nickname. Growing up I was always called Rosie. And somehow Rosie-Posie morphed into Rose-Toes, eventually dropping the Rose half. I thought about my family nickname for my blog, but somehow “toes” and “food” together just didn’t make it.

Monday, August 15, 2011

For the Love of Mikey -- Peanut Butter Pie

I don't know Jennie.   I just know Jennie's blog.  She is a delightful writer, a woman now so heartbreakingly saddened by the sudden death of her too young husband -- Mikey.  After an inevitable outpouring of sympathy and prayers, particularly from food bloggers and writers, she suggested that those who wanted to do something should make this peanut butter pie and share it with someone you love.  Hundreds of peanut butter pies were made last Friday.  I learned of about this from the meaning of pie.  And I immediately checked the pantry and made the pie.
Last Thursday, a dear friend of ours complained about heartburn.  A few hours later, he was in the hospital, with, as you might guess, a heart attack.  He's okay, but shaken.  As are we.  And sensitized to how precious life is.  And how complacent we can become. 
Mr. Rosemary likes no dessert better than anything with nuts and chocolate.  Making this pie was an act of love.  And after he ate a piece of pie, he got the world's biggest hug.


Creamy Peanut Butter Pie
Serves 10 to 12
from In Jennie's Kitchen

8 ounces chocolate cookies
4 tablespoons butter, melted
4 ounces finely chopped chocolate or semi-sweet chocolate chips
1/4 cup chopped peanuts
1 cup heavy cream
8 ounces cream cheese
1 cup creamy-style peanut butter
1 cup confectioner's sugar
1 – 14 ounce can sweetened condensed milk
1 teaspoon vanilla extract
1 teaspoon freshly squeezed lemon juice

Add the cookies to the bowl of a food processor and pulse into fine crumbs. Combine melted butter and cookie crumbs in a small bowl, and stir with a fork to mix well. Press mixture into the bottom and 1-inch up the sides of a 9-inch springform pan.
Melt the chocolate in a double boiler or in the microwave. Pour over bottom of cookie crust and spread to the edges using an off-set spatula. Sprinkle chopped peanuts over the melted chocolate. Place pan in the refrigerator while you prepare the filling.
Pour the heavy cream into a bowl and beat using a stand mixer or hand mixer until stiff peaks form. Transfer to a small bowl and store in refrigerator until ready to use. Place the cream cheese and peanut butter in a deep bowl. Beat on medium speed until light and fluffy. Reduce speed to low and gradually beat in the confectioner's sugar. Add the sweetened condensed milk, vanilla extract and lemon juice. Increase speed to medium and beat until all the ingredients are combined and filling is smooth.
Stir in 1/3 of the whipped cream into the filling mixture (helps lighten the batter, making it easier to fold in the remaining whipped cream). Fold in the remaining whipped cream. Pour the filling into the prepared springform pan. Drizzle the melted chocolate on top, if using, and refrigerate for three hours or overnight before serving.

Friday, August 12, 2011

Chard & Cannellini Crustless Quiche and (No) Regrets

I really don’t have any regrets about my life’s choices. There have been mistakes, sure, but it’s comforting to think that this grasshopper learned some good lessons along the way. The only thing I sometimes wish I’d done differently is having the chance to live completely on my own. I’ve never really done that. (And if I had, I would have made dishes like this more often.)

When I went away several hundred miles to college (and what seems like several hundred years ago), I was assigned to live in dormitory with all single rooms. What was initially lonely turned out to be a terrific way to make new friends. We were all in the same boat. By sophomore year, my three new BFF’s and I were using the lowest lottery number among us to pick the best “quad” room we could – a huge renovated classroom that was our home for the school year. What a blast we had there!

The following year, one of us took a break from school, and then there were three. This time, our number was even better and we “won” a beautiful suite, two bedrooms, bath, beautiful view. Then mid-year, one of us got the marriage bug and abandoned us. Now we were two and Michele and I reveled in our luxurious little apartment.

LeMans Hall at St. Mary's Collge, Notre Dame Indiana

By senior year, though, Michele was ready to move off campus and rent a house with several other friends. Although I was welcome, I really didn’t want to go. I liked campus life. So I stayed behind and this time chose another single! Most of the rooms on the same floor were also singles, so we were enjoying the ebb and flow of wanting privacy and then company. We were mostly English majors, it so happened, so I had another sense of community.

It wasn’t until several years later when I was having an intimate chat with my mother that she shared with me how much she enjoyed living a few years on her own after she graduated college. It wasn’t because Mom was a party animal. Au contraire! The experience taught her real independence and responsibility. She worked all day as a teacher, was involved with school activities, might go skating, grade her papers and fall into bed. And she said she wished that I had been able to do the same at that tender age, instead of taking the long way like I have. I hadn’t really thought about it until she mentioned it. I had pretty much jumped from home to college to marriage to working to motherhood, to making that all work together.

But it’s just a minor regret. I can see myself as a young woman decorating a little studio apartment, cooking in a teeny tiny “kitchenette,” entertaining friends with great dinners on a card table graced with candles. (Actually, I had my eye on a great looking carriage house.) But if I had taken that turn, maybe I wouldn’t have ended up here and I wouldn’t trade this life for anything.

Back to cooking – I often fall back on egg dishes. Eggs, especially Dude’s eggs, are a great way to make a motley collection of stuff come together. This dish came together because I had a lot of Swiss chard growing in the garden. This “crustless” quiche is a great way to cut back on the carbs a bit. And the reason I call it a crustless quiche instead of a frittata is because everything just goes straight to the oven – no stove top cooking of the eggs to start. I wish I would have taken a picture of this as soon as it came out of the oven. It looked so pretty then, all puffy and golden brown, looked like a soufflĂ©. Whatever it’s called, it was delicious, especially with the addition of the curry powder. I only regret not adding something red - like peppers or tomatoes for a little color kick

Chard & Cannellini Crustless Quiche
About 4 cups fresh Swiss chard leaves (a big bowful)
2 tablespoons butter, divided
½ cup chopped onions
1 cup cannellini beans, rinsed and drained
1 cup shredded Swiss cheese
4 large eggs
1 cup half-and-half
1 teaspoon curry powder

Preheat oven to 375 degrees Fahrenheit. Lightly film a 9 inch pie pan with vegetable spray.  Melt the butter in a high-sided frying pan and cook the Swiss chard leaves until wilted. Remove from pan to a cutting board and roughly chop. Wipe out the pan and add another tablespoon of butter and sautĂ© the onion until transparent, not browned. Place the chard, onion, beans, and Swiss cheese evenly in the pie pan. Then whisk the eggs and half-and-half together. Add the curry powder and pour the custard over the veggies. Carefully place in oven and bake for 25 to 30 minutes.

Monday, August 1, 2011

Visit My Farm, Have a Great Cookie -- and an Award!

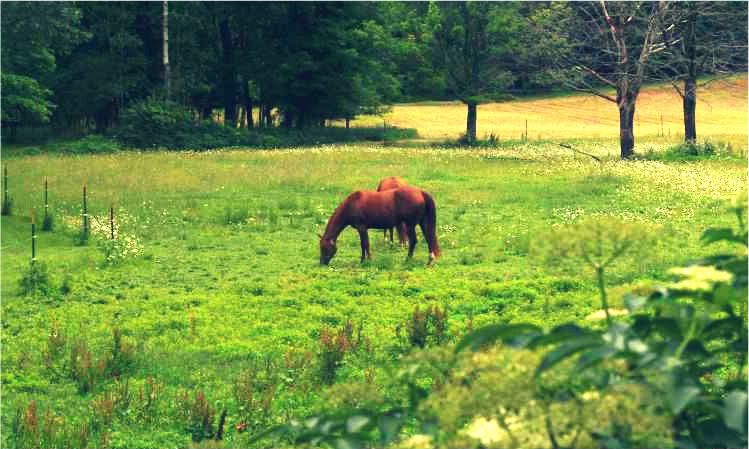
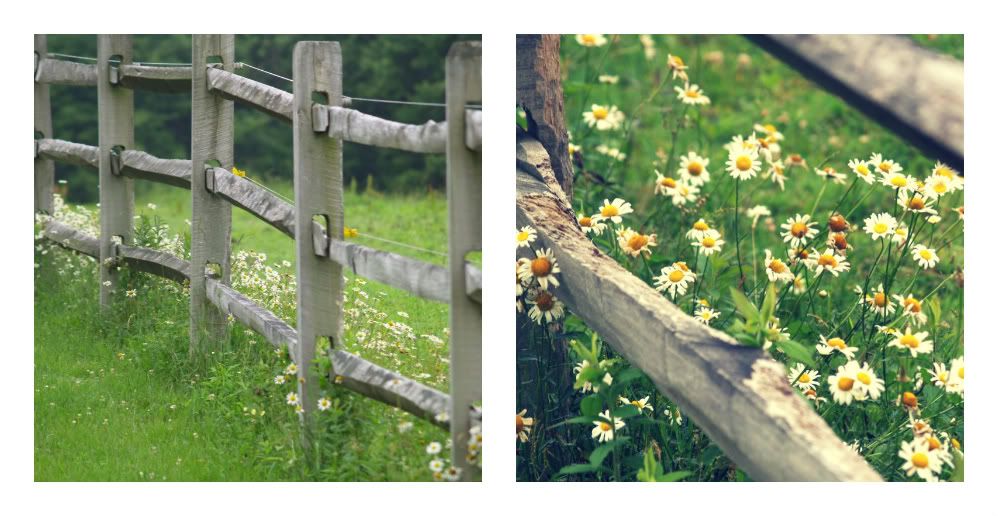
When my stepdaughter posted these pretty pictures on her blog,
b e h i n d  t h e  m o o n, I quickly glanced at the photos and thought to myself, "Isn't that pretty? I could live there."  Then I quickly realized, "I do!" 
Krista's camera and artist's eye really made our farm come alive.  She saw beauty in even the most humble of farm equipment.  (Our horses always look great.)
Take a look at what I mean:


The grandsons seem to love everything about the farm!

even the equipment looks pretty!

My favorite view.


And after their last visit, we roasted good ol' hot dogs and marshmallows at the fire and had some of these cookies, which the boys devoured.  Hope you like them, too.
White Chocolate Chip Cookies
From Pat at church who can’t remember where she got it

¾ cup sugar
¾ cup firmly packed brown sugar
1 cup shortening
3 eggs
1 teaspoon vanilla
2 ½ cups all purpose flour
1 teaspoon baking powder
1 teaspoon baking soda
½ teaspoon salt
1 cup coconut
½ cup rolled oats
1 cup chopped walnuts
1 12-ounce package white chocolate chips

Preheat oven to 350 degrees F. In large bowl, combine the sugars and shortening and beat well. Add eggs, one at a time, beating well each time. Add vanilla; blend well.

Add flour, baking soda, baking powder and salt. Mix well. Than add coconut, oats and nuts. Drop by rounded tablespoonfuls 2 inches apart on ungreased baking sheets. Bake for 10 to 15 minutes until lightly golden brown. Cool 1 minute on sheet, then remove to rack to cool completely before storing in airtight container. Makes 5 dozen cookies.

* * * * * * *

I hope you'll visit Krista's blog.  She's a young mother who has a sunny outlook on life and writes beautifully about her family and friends.  She also has an etsy shop where she sells her handmade jewelry.  Beautiful stuff!

And now for the awards . . . . I was a lucky recipient of the award below, thanks to the very kind and generous Elisabeth at food and thrift finds.  And so now it's my turn to pass it on.  I decided to go exploring and find some bloggers new to me, since I seem to share a lot of my readers with Elisabeth.  It was definitely easy to find blogs that were appealing.  There's so much great talent out there! 

So here's a great bunch of bloggers to check out, if you haven't already.  A lovely variety.  Congratulations to: